


 Printer Friendly Version
Setting up a QuickBooks user for each person who enters data, provides a level of control over the sensitive data to be viewed by this user, and gives access to specific areas in QuickBooks. For additional control, a user-specific password can also be assigned. When you create a new user (or edit an existing user) in QuickBooks, you can assign that user as an External Accountant. As an accounting professional using the CDR (Client Data Review) you will want to request that your client create a username for you and assign the new External Accountant Type. If you then log in to the client file with this new user type, you will benefit from the following:
- Complete Admin access, except that you cannot create or edit users or view sensitive customer credit card numbers.
- Reports such as the Audit Trail can be filtered in Excel for a specific username, enabling you to see your transactions separate from the client’s transactions.
- Client Data Review distinguishes in the dialog box if your login is the new External Accountant type, as shown here:
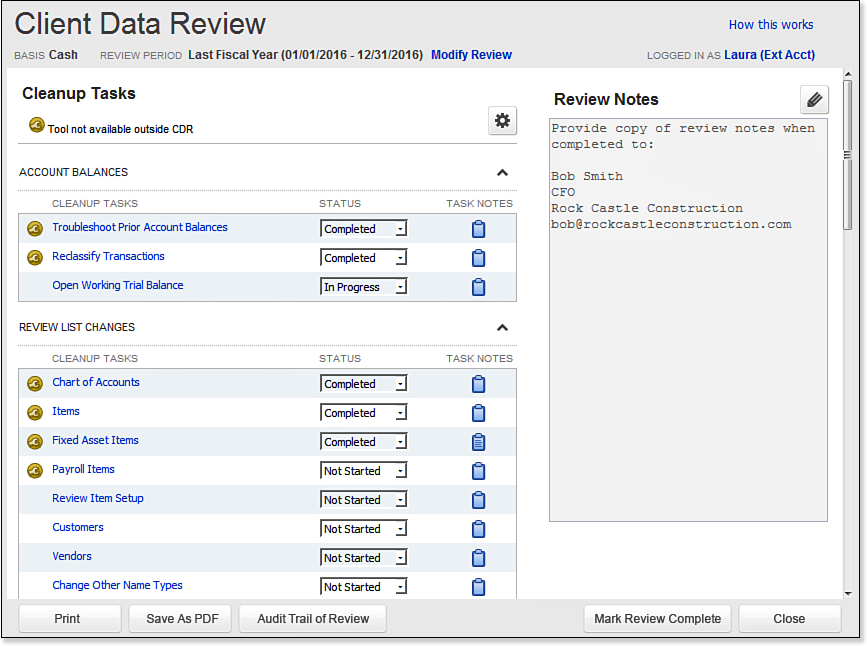
Client Data Review (CDR) is helpful for finding and fixing your client’s QuickBooks data entry errors.
- Access to Accountant Center, plus limited accountant and CDR tools when logging in to a client’s QuickBooks Pro, Premier, or Enterprise 2013 non-accountant edition file.
If you are reviewing your client’s data using the Accountant’s Copy file type, or if you are not given the Admin login, this new External Accountant will have to be created before your client creates the Accountant’s Copy or has you review data files. To create an External Accountant, follow these steps:
- Open the QuickBooks data file using the Admin user (the default user QuickBooks creates with a new QuickBooks file) and enter the appropriate password if one was created.
- From the menu bar, select Company, Set Up Users and Passwords, Set Up Users.
- Enter the Admin user password if one was originally assigned. Click OK.
- The User List dialog box opens; it lists the current users set up for this file.
- Click the Add User button to create a new user, or select an existing username and click the Edit User button.
- The Set Up (or Change) User Password and Access dialog box opens.
- In the User Name field, type the name you want the user to be identified by in the file.
- In the Password field, enter an optional password, and in the Confirm Password field, retype the password for accuracy.
- (Optional) Click the box to Add This User to My QuickBooks License. (See the Explain link for more details.)
- Click Next. You might receive a No Password Entered message, click Yes or No to creating a password. If you select Yes, you will be taken back to step 8. (Optional) Select Do Not Display This Message in the Future. The Access for User: dialog box opens.
- Select the option for External Accountant, as shown here:
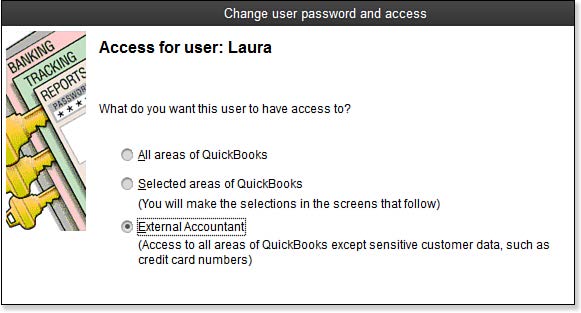
Ask your client to create an External Accountant type user for your login.
- Click Next.
- QuickBooks provides a warning message, confirming that you want to give this new user access to all areas of QuickBooks, except customer credit card numbers. Select Yes to assign the new External Accountant type privileges to this new or existing user.
- The Access for User: dialog box opens. The message restates that the new External Accountant user will have access to all areas of QuickBooks, except sensitive customer credit card data. Click Finish to complete the process.