


 Printer Friendly Version
Often, as accounting professionals, we need to adjust our client’s Accounts Receivable balances. Perhaps there were several small unpaid finance charge invoices, or over the year our client’s customers paid their invoices short of what was due.
Creating a customer credit memo and assigning the credit memo to the original open invoice was time-consuming for the accounting professional. Often a journal entry was created, correcting the accounts receivable balance on the Balance Sheet, but leaving the QuickBooks user with extra line details in the A/R Aging Summary or Detail reports.
The Write Off Invoices feature (shown below) is one convenient window where you can write off balances, review the suggested transaction, and print the details for your customer.
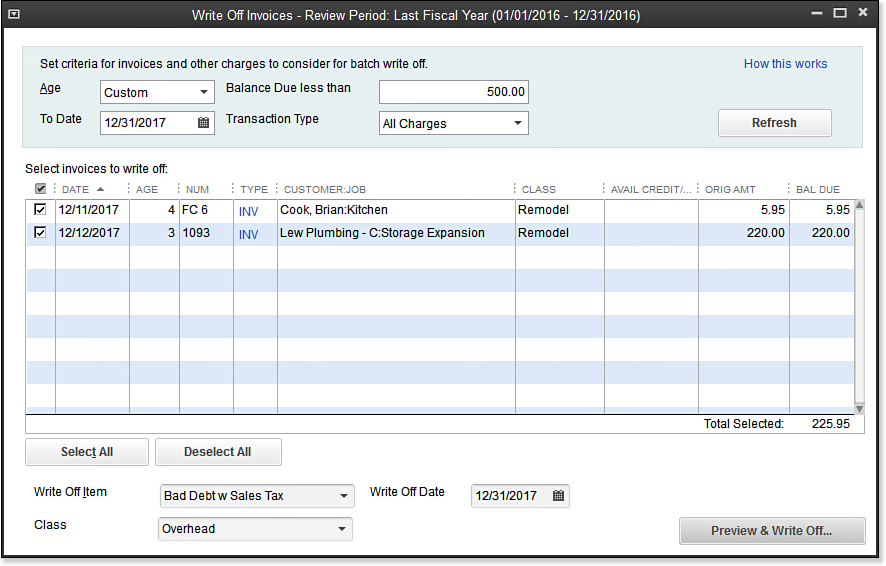
Using CDR’s Write Off Invoices makes removing open A/R uncollected balances easy!
To write off invoices, follow these steps:
- If Client Data Review isn’t already open, select Accountant, Accountant Center from the menu bar.
- Select the Write Off Invoices task in the Accounts Receivable task group.
- If presented with the warning that one or more customers in the list have available credits, click OK to close the message. Be sure to do a thorough review of your client’s Open Invoices reports as previously recommended.
- From the Age drop-down list, select between showing receivables aged over 120 days, aged over 180 days, Review Period, or a custom date.
- (Optional) Enter an amount in the Balances Due Less Than box to limit the transactions that are displayed, which is particularly useful when writing off small balances only.
- Select a To Date.
- From the Transaction Type drop-down list, select All Charges, Invoices, Finance Charges, or Statement Charges.
- Click Refresh if changing the filters.
- Place a checkmark next to each transaction for which you want to write off the open balance. (Optional) Click the Select All button or Deselect All button at the bottom of the screen to simplify the process.
- From the drop-down lists, select the Write-Off Item and Write-Off Date. (Optional) Select a Class.
- Click the Preview & Write-Off button. CDR displays the Confirm Write-Off dialog box, as shown here:
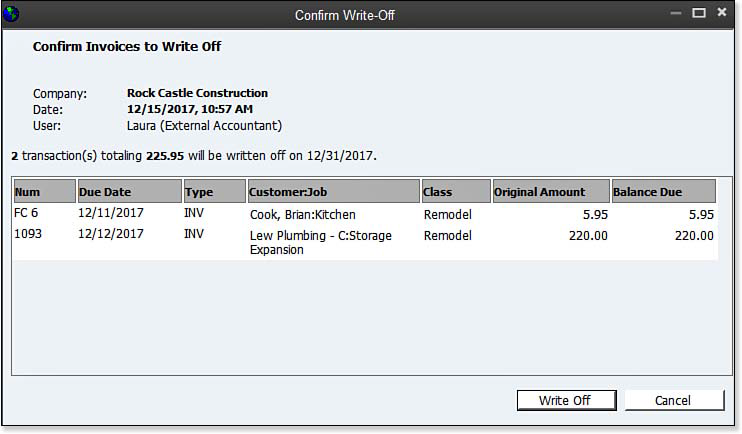
You stay in control of the write-off, confirming the balances to be removed.
- Click Write Off when you are done reviewing the invoices, or click Cancel.
- CDR returns you to the Write Off Invoices dialog box. Press the Esc key on your keyboard to view the Write-Off Completed details.
- Click Save as PDF to print for your records.
QuickBooks creates a Credit Memo transaction using the item and date you selected at the time you created the write-off and applies this credit to the original invoice.
You are now finished with the Accounts Receivable tasks! There are many QuickBooks preferences that will guide your clients as they manage undeposited funds and accounts receivable transactions. Review Chapters 9 and 10 of Laura Madeira’s QuickBooks 2013 In Depth for more details and other Accounts Receivable troubleshooting suggestions.
Here’s another tip from Laura Madeira’s QuickBooks 2013 In Depth:
If the customer’s invoice being written off included sales tax, make sure the item selected for the write-off is a taxable item. This ensures that the sales tax payable account also shows the credit, which is important when sales tax is paid on Accrual basis.
From Laura Madeira’s QuickBooks 2013 In Depth