


 Printer Friendly Version
QuickBooks makes adding, modifying, and researching vendor activity easy, using the Vendor Center. Vendors are individuals or companies that you purchase services or products from, and they are managed in the Vendor Center as displayed here:
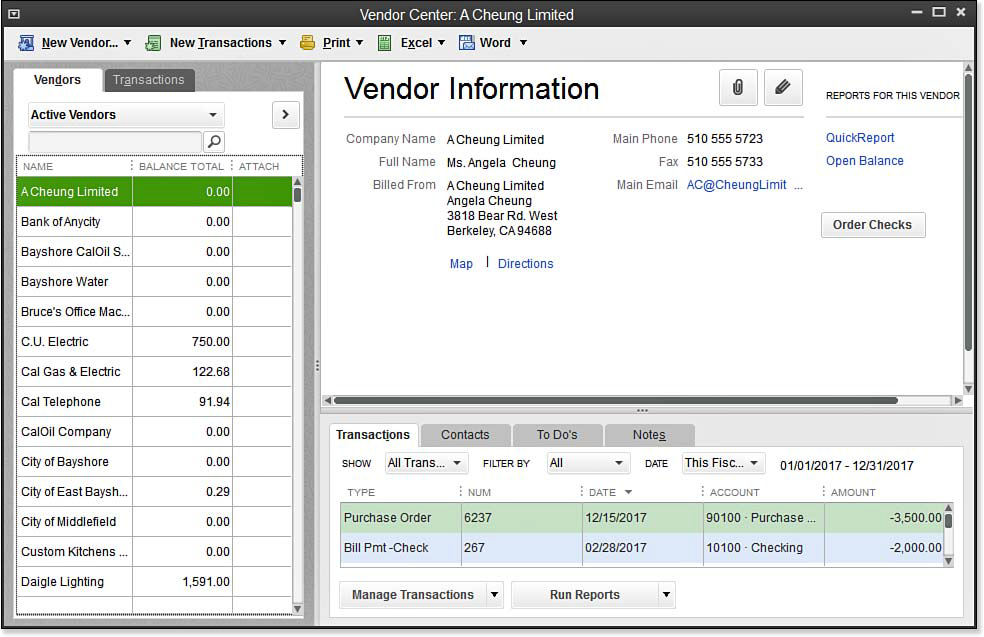
Complete common vendor tasks from the Vendor Center.
From the Vendor Center, you view contact details for your vendors and can access many tasks, including the following:
- Create a new vendor or edit an existing one.
- Add Multiple Vendors (using the Add/Edit Multiple List Entries feature discussed in Chapter 4 of Laura Madeira’s QuickBooks 2013 In Depth, titled: “Understanding QuickBooks Lists”).
- Record commonly used vendor transactions.
- Print the vendor list, information, or transactions.
- Export the vendor list or transactions; import or paste vendors from Excel.
- Prepare vendor letters and customize the vendor letter templates.
- Filter your list of vendors to include All Vendors, Active Vendors, Vendors with Open Balances, or a custom filter of your choice.
- Attach documents to vendor records, such as attaching a copy of the signed subcontractor agreement.
- Access a map and driving directions to a vendor’s location.
- Add and edit vendor contact names, to-do reminders, and notes.
- View and filter a list of transactions by vendor or by transaction type.
- Prepare a QuickReport or Open Balance Report for a given vendor.
Use the Vendor Center to access many of the common vendor transactions and reports. You can learn all about how to use these features in Laura Madeira’s QuickBooks 2013 In Depth in Chapter 7 “Setting Up Vendors” and Chapter 8 “Managing Vendors.”
From Laura Madeira’s QuickBooks 2013 In Depth